
Sunday, April 16, 2023
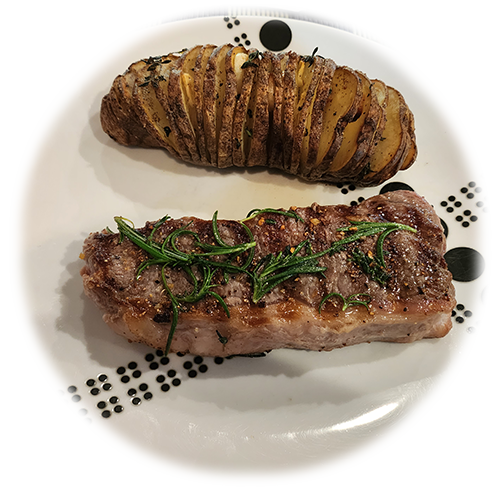 The main course for dinner tonight is New York strip steak with Hasselback potatoes. For Gene’s steak, I’ll be using a sous vide cooker to get it medium-well done; for my steak, I’ll just sear it in the pan. The Hasselback potatoes go in the oven.
The star of tonight’s dinner is the dessert, a raspberry cream pie. For that, I use a cookie crumb crust, cream cheese, and whipped cream. The crust recipe is based on one I found on Williams Sonoma, while the filling is from Mom With Cookies.
The recipe for the sous vide steak is hardly a recipe at all. You set the cooker to 145F, seal the steak and seasonings in a baggie, drop the baggie in the sous vide bath, and in a couple of hours you’re done. I used salt, pepper, fresh rosemary and thyme for the seasonings. Once done, you remove the steak from the bag, dry it off, and then sear it in a hot pan get the Maillard reaction. For my steak, all I did was sear it with herbs, which gives me a perfect rare steak.
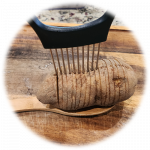
Hasselback potatoes look super-fancy and taste awesome, but they are easy to fix–barely more difficult than the traditional wrapped-in-foil baked potato. The idea is that you make slices about 1/8 to 1/4 inch apart that go almost-but-not-quite all the way through the potato. You can purchase a guide from Amazon to assist in getting evenly spaced slices. If you put the potato on on wooden spoon, that will keep you from slicng all the way through the potato. Slicing two potatoes takes maybe five minutes.
Once sliced melt some butter and olive oil (maybe 2TBSP of each), and baste the potatoes; save about 1/2 of your butter/oil mixture for later. I usually cut 3-4 cloves of garlic into thin slices and stick them between the potato slices at this time to infuse the garlic flavor into the potato while cooking. Put the potatoes on a roasting pan and bake them in a 420F oven for roughly an hour. After about 45 minutes, the slices will separate, so that’s a good time to pull them out, use the rest of your butter/oil mixture to baste them again so it gets between the slices. This is also the time to add other herbs as well. I used fresh thyme since I had it.
I used russet potatoes because that’s what I had on hand. Usually, I use red potatoes since they are smaller and “waxier.” When the potatoes are done, you’ve got an impressive-looking side dish that tastes awesome. The tips of the potatoes are crispy like French fries, while the interiors are soft like a baked potato.
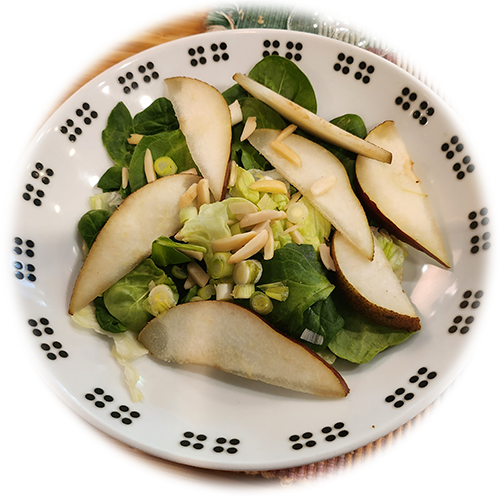 We also had a green salad with baby spinach, iceberg lettuce, chives, slivered almonds, and thinly sliced pears.
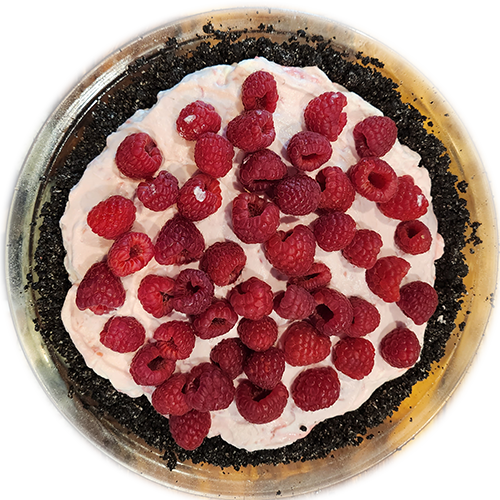 But the star of tonight’s dinner is the dessert: raspberry cream pie with a chocolate cookie crumb crust.
When I looked for recipes on chocolate cookie crumb crusts, I found tons. Most of them started with 24 Oreo cookies. After that, they split in half. One half just dumped the cookies, filling and all, into a blender and used the result as the basis for the crust. That means that you get all that extra yucky lard (the filling) in your crust. Now, don’t get me wrong. I love Oreo double-stuff cookies, but not in my pie crust. The other half laboriously separated the cookies and filling, discarded the filling (ordinarily the best part), and used the blender to crumble the rest.
However, you can purchase chocolate cookie crumbs from Nabisco. No need for blender, no lardy filling to discard or to clog your crust. Or, you could purchase chocolate graham crackers, put those in your blender, and get chocolate cookie crumbs that way. I chose the easy way and got the Nabisco chocolate cookie crumbs via Amazon. I use them in my chocolate chiffon cake too. (I’ll post the recipe for that later.)
Ingredients
Equipment
Method
- pre-heat oven to 350F
- Mix together cookie crumbs, sugar, and salt if using
- Melt butter in microwave
- Drizzle butter into sugar/cookie mixture in thirds, mixing with a spatula in between additions. Don't add the butter all at once–it will clump up in the cookie/sugar mixture and you won't be able to properly mix it in.
- Dump the mix of butter, cookie crumbs, and sugar into a 10 inch pie pan. use your fingers to press it down and start to force it up the sides of the pan.
- Use a flat-bottomed measuring cup to press the crust into the plate and form up the sides. I used a 1/2C measuring cup, but a small glass would work fine, too. You just need something with a flat bottom that you can use to push the crust into the plate–especially the crust on the sides.
- Bake for 5-10 minutes to set the crust. Five minutes is the minimum; the longer times give you a progressively crispy crust. For this dessert, I baked mine for seven minutes, which seemed to be about right.
- Cool to at least room temperature before assembling the pie. If it will be more than an hour before you use it, cover it with plastic wrap and refrigerate.
Notes
Ingredients
Equipment
Method
- Bring the cream cheese to room temperature, then whip for 2-3 minutes in stand mixer with whisk
- Add sugar and 6oz of raspberries to small saucepan and apply low heat
- Use wooden spoon to stir the berries and sugar, crushing the berries with the back of your spoon. Simmer for 3-4 minutes until mixed.
- Optional: most recipes say to strain the seeds out of berries. Note that the seeds contain many healthy nutrients, so if you strain them out you are throwing away some of the benefits of the berries. I did not strain my berries, and my pie turned out fine. Strain them if they upset your stomach, get in your dentures, or you don't like the texture of cream filling–it is slightly grainy with the seeds still in it.
- Optional: add a teaspoon of lemon juice to the berry mixture. This can help bring out the flavor of the fruit.
- Pour berry/sugar mixture into the cream cheese. Whip for 3-4 minutes until thoroughly mixed and uniform pink in color.
- While the berries and cream cheese mix, put the heavy cream, powdered sugar, and vanilla in a chilled metal bowl and whip to stiff peaks. (Chilled bowls work best when whipping cream.)
- Fold the cream cheese/berry mixture into the whipped cream. Shoot for about a dozen folds to get the two mixed together. Over-folding can cause the whipped cream to collapse, so be careful!
- Use a spatula to place the final mixture in your cooked pie shell and smooth out the filling. Top with the remaining 6 oz of raspberries. Cover and refrigerate until ready to use. You can do this a day ahead if needed.
Another fabulous dinner and blog entry! I will definitely try your raspberry pie filling recipe , but with a graham cracker/almond crust, I think.
Thanks for sharing!
Bon appetit!