
I made this cake over the span of three days for my contribution to a dinner party with some friends. We take turns hosting, with the guest providing the dessert and the host providing the main course. This dessert was a hit, both in appearance and in taste.
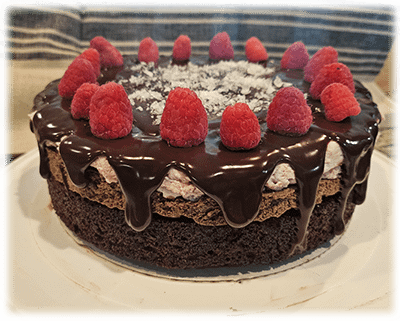
This dessert starts with a base layer of cake, then a layer of chocolate mousse, followed by a layer of raspberry mousse. It’s topped with a chocolate ganache that drips down the sides and a garnish of fresh raspberries and flake salt. I’ve put each of the four recipes–cake, two mousses, ganache–in separate files linked below.
The reason it took three days to prepare is because I wanted to fully chill each layer before applying the next one. So, day one was for the cake base, day two was for the chocolate mousse layer, and day three was for the raspberry mousse layer. I let that chill until late afternoon, when I applied the ganache and garnishes before taking it to the dinner. Each layer took perhaps an hour total to make, and the drip topping about the same, so the actual time in the kitchen wasn’t that great.
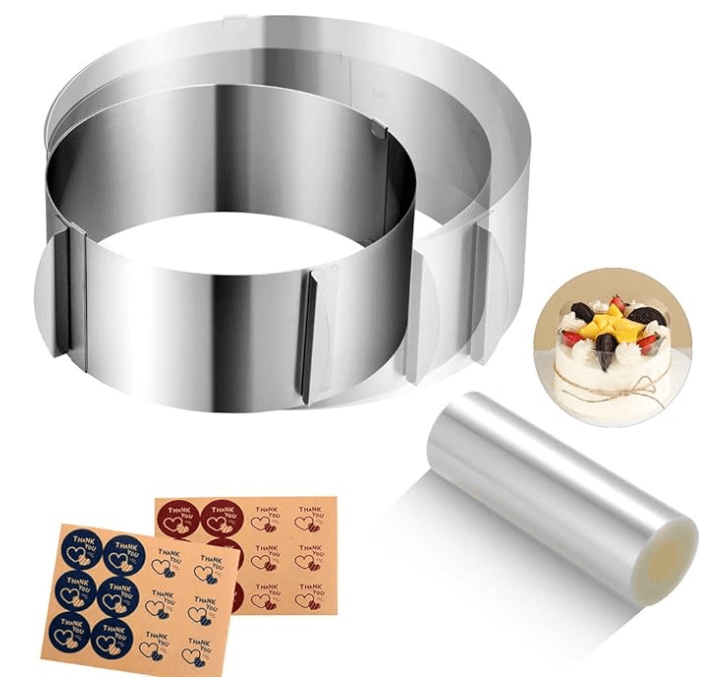
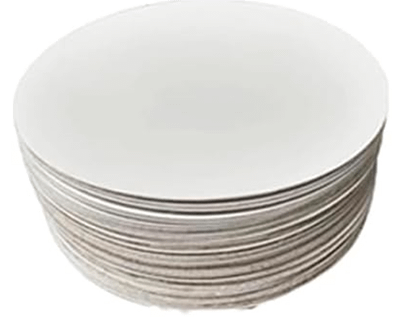
To do a cake with mousse layers, you need a cake mold and acetate liner. I also used an 8-inch spring-form pan to bake the cake layer and 8-inch cake rounds. I got all of these on Amazon–links are below.

The cake looks pretty good, but would look better if the mousse layers were taller. I’ve doubled the recipes in the links below for the two mousse layers, so if you use these recipes, you’ll get more mousse and a better looking dessert.
The mousse layers are are extra thick, in the viscuous sense rather than height, because I wanted to be sure they were stable enough to support the structure of the dessert. I used gelatin as thickener, something you would neither need nor want if you were just making mousse for a dessert cup, partait, or pie. The ganache recipe below is also specialized to create the drip effect and is non-standard in that it uses a higher ratio of chocolate.
There are links to the four recipes below, followed by instructions on assembling the various parts into the dessert in the picture.
Assembling the Layers
The method to assemble the parts is pretty straight-forward.
- bake the chocolate brownie cake in an 8-inch round cake pan–I used a spring-form pan–, place it on an 8-inch cake round or serving platter, and chill it overnight in the refrigerator or freezer. I like using cardboard cake rounds sized to match the cake so the invevitable ganache drips don’t show on the resulting base.
- Cut a 3″ tall sheet of acetate that’s long enough to go around your cake–that’s at least 24.3 inches for an 8″ round if you’re wondering.
- Put your adjustable cake mold around the cake and, before tightening it, put the acetate sheet between the mold and the cake.
- Tighten the mold so that both it and the acetate fit snugly against the cake. It’s going to stay there until the the rapspberry mousse is in place and has set up. Put the cake back in the refrigerator or freezer while you make and chilll the chocoloate mousse.
- Make the chocolate mouse, chill it, and spread it on top of the cake. Level it as best you can. Make sure that if goes all the way to the acetate and there are no bubbles or gaps.
- Pop the whole thing back in the refrigerator or freezer and wait a few hours or overnight.
- Make the raspberry mousse. Wait a couple of hours or overnight, and then place it on top of the chocolate mousse.
- Back in the refrigerator or freezer for a few hours.
- Now you can remove the mold and acetate. This is one place where you’ll get a difference in appearance between using the refrigerator or freezer. If the dessert has just been sitting in the refrigerator, bits of both mousses will cling to the mold and you won’t have a perfectly smooth surface. But if it’s been in the freezer, the acetate shouldn’t stick to the mousse, and it will be perfectly smooth, or at least smoother. I never have room for a cake in my freezer, so in my case this is moot.
- Anyway, once it’s safe to unmold the dessert, do so. But put it back in the refrigerator or freezer until your done making the ganache and waiting for it to cool. You want the dessert as cold as you can get it before applying the ganache in order to get the drip effect.
- The ganache recipe above describes the techniques for creating the drip effect.
- For the garnishes–fresh raspberries and flake salt in the picture–let the ganache set up in the refrigerator for at least an hour before applying them.
That’s it! None of the steps are really hard, and I think the result is both impressive-looking and tastes great.
Be First to Comment